AC duct replacement plays a crucial role in maintaining a well-functioning HVAC system. Over time, ducts can develop leaks, tears, or blockages that disrupt airflow and strain your heating and cooling unit. Damaged ducts may also harbour dust, allergens, or mould, negatively impacting indoor air quality and posing health risks. Moreover, compromised ductwork often leads to uneven temperature distribution, making certain rooms uncomfortable and harder to heat or cool effectively. Replacing outdated or damaged ducts can address these issues, enhancing the overall performance of your HVAC system. Modern duct materials offer improved insulation and durability, ensuring that your system operates more efficiently and uses less energy. By addressing ductwork problems promptly, you can reduce unnecessary wear on your equipment and prevent costly repairs or breakdowns in the future. A proactive approach to duct replacement can also contribute to a healthier living environment, particularly for individuals with allergies or respiratory conditions.
Preparing for the AC Duct of Replacement Process
To prepare for the AC duct of replacement process, begin by gathering all necessary tools and materials. Essential items include a screwdriver, duct tape, a utility knife, and the replacement ducts. Safety gear is equally important; ensure you have gloves, goggles, and a dust mask to protect yourself from sharp edges, dust, and debris. Next, turn off your HVAC system completely to eliminate any risk of electrical hazards or air circulation during the process. Clear the work area of any furniture or obstacles to provide adequate space for safe movement and installation. Familiarise yourself with the layout of your existing ductwork by consulting the HVAC system's manual or any available diagrams. This preparation will help you identify access points and simplify the removal and installation process. Additionally, inspect your current ductwork for visible damage and note specific areas needing replacement. Proper preparation not only makes the process smoother but also helps minimise errors during the replacement.
Assessing the Existing Air Conditioning Duct Replacement Condition
Start by carefully examining your existing Air Conditioning Duct Replacement for any visible signs of wear and damage. Look for holes, tears, loose connections, or areas where the material appears deteriorated. Pay close attention to joints and corners, as these are common spots for leaks to develop. Use a torch to inspect hard-to-reach sections, ensuring no areas are overlooked. Listen for unusual noises, such as whistling or rattling, which may indicate air escaping through gaps. Check for dust or debris accumulation around the ducts, as this can suggest leaks or improper sealing. If you notice uneven temperatures between rooms or rising energy costs, it could point to duct inefficiency. Measure airflow at vents using an anemometer to identify weak spots. Ensure you assess both exposed and concealed ducts, including loft or crawl space sections, to fully understand the condition of your system. Document any issues to determine whether repairs or a complete replacement is necessary.
Selecting the Right Materials for AC Duct of Replacement
When selecting materials for AC duct of replacement, prioritise options that balance durability, efficiency, and ease of installation. Flexible ducting, made of plastic and reinforced with metal wire, is lightweight and adaptable, making it suitable for tight spaces. Sheet metal ducts, typically constructed from galvanised steel or aluminium, provide robustness and longevity, particularly in areas requiring high structural integrity. Fibreglass duct board offers excellent thermal insulation, reducing energy loss and maintaining consistent temperatures. For areas prone to moisture, consider materials with anti-mould or water-resistant properties to prevent damage over time. Ensure the material you choose is appropriately sized for your HVAC system to facilitate proper airflow and avoid strain on the unit. Opt for materials that comply with local building regulations and energy efficiency standards. Check for features such as pre-insulated designs or reinforced joints to minimise installation time and improve performance. Investing in high-quality materials tailored to your system's needs enhances efficiency and reduces long-term maintenance requirements.
Step-by-Step Guide to Removing Old AC Ducts
To begin removing old AC ducts, switch off the HVAC system entirely to avoid any risk of injury or interference during the process. Carefully locate and identify the duct sections that require removal. Using a screwdriver, unscrew or loosen any clamps, fasteners, or connections securing the ductwork to the HVAC unit and adjacent sections. Gently detach the ducting, ensuring no damage occurs to the connecting components or surrounding areas. For adhesive or sealed joints, use a utility knife to cut through the material cleanly. Handle the ducts cautiously to prevent releasing accumulated dust or debris into the air. If the ducts are suspended, dismantle supporting brackets or hangers, keeping the workspace safe and organised. Place the removed duct sections in heavy-duty rubbish bags for proper disposal according to local regulations. Ensure the area is clean and free of residual materials before proceeding with the installation of new ductwork.
Installing New AC Ductwork: A Detailed Guide
Start by positioning the new duct sections in alignment with the layout of your existing system. Cut the ducting to the required lengths using a utility knife or specialised cutting tools, ensuring clean edges for secure connections. Attach each duct section to the corresponding HVAC outlet or adjacent duct using appropriate fasteners, clamps, or adhesive materials. When securing flexible ducts, ensure they are pulled tight to avoid sagging or kinks that could restrict airflow. For rigid ducting, check that all seams are tightly joined and supported with brackets or hangers at regular intervals to maintain stability. Seal the joints meticulously using mastic sealant or high-quality duct tape, focusing on potential leak points such as corners or bends. For areas with challenging access, consider using pre-insulated ducts to simplify the process and enhance efficiency. Continuously check for proper alignment and airflow as you proceed, ensuring the ducts are installed without obstructions or unnecessary bends.
Ensuring Proper Insulation and Sealing of Ducts
Effective insulation and sealing of ducts are vital for optimising your HVAC system's performance. Begin by inspecting the entire length of the ducts for areas that may require additional insulation, particularly in spaces like lofts, basements, or crawl areas where temperature changes are more extreme. Use high-quality insulation material specifically designed for ductwork, such as fibreglass or foam, and ensure it is applied evenly without gaps. Pay special attention to bends, joints, and connections, as these are common points for energy loss. For sealing, apply mastic sealant with a brush or use specialised foil duct tape, which is designed to handle heat and airflow pressure. Avoid using standard duct tape, as it tends to deteriorate over time. Secure all insulation with tape or ties, ensuring it remains intact during regular use. Regularly check for any signs of wear or gaps in the insulation and address them promptly to maintain efficiency.
Regular Maintenance Tips for Longevity of AC Ducts
Here are 5 <h3> headings with practical descriptions for the topic "Regular Maintenance Tips for Longevity of AC Ducts" — perfect for a homeowner's guide, HVAC blog, or maintenance checklist:
1. Schedule Professional Duct Inspections Annually
Having your AC ducts inspected by a certified HVAC technician at least once a year helps catch early signs of wear, leaks, or blockages. These inspections ensure your system runs efficiently, extends its lifespan, and helps maintain indoor air quality.
2. Replace or Clean Air Filters Regularly
Clogged or dirty filters force your system to work harder, putting extra strain on your ducts. Replace disposable filters every 1–3 months, or clean reusable ones according to manufacturer guidelines. Clean filters improve airflow and reduce dust buildup inside the ducts.
3. Seal Leaks and Insulate Exposed Ductwork
Leaky ducts cause energy loss and inconsistent cooling. Use mastic sealant or metal tape to seal visible gaps, and insulate ducts that run through unconditioned spaces like attics or basements. This prevents condensation, reduces wear, and improves efficiency.
4. Keep Vents and Registers Clean and Unblocked
Dust and debris around vents can travel into your ducts, leading to buildup and reduced air quality. Regularly vacuum and wipe down all vents and ensure furniture or curtains aren’t blocking airflow. Good circulation reduces pressure on the duct system.
5. Control Moisture to Prevent Mold Growth
Moisture inside ducts can lead to mold and mildew, which degrade air quality and damage the system. Ensure your AC unit’s drainage is functioning properly, check for condensation around ducts, and maintain a balanced indoor humidity level — ideally between 30% and 50%.
Common Mistakes to Avoid During AC Duct of Replacement
Failing to inspect the existing ductwork thoroughly before replacement can lead to overlooking underlying issues such as structural damage or mould, which may persist even after new ducts are installed. Skipping the step of measuring and planning the layout properly can result in poorly aligned ducts, restricting airflow and causing inefficiency. Using the wrong type of sealant or tape, such as standard duct tape, is another frequent error, as it may degrade quickly and lead to air leaks. Incorrect installation of flexible ducts, such as leaving them slack or creating sharp bends, can impede airflow and reduce system efficiency. Ignoring the importance of proper insulation in areas like lofts or basements can result in significant energy loss. Additionally, failing to secure ducts with adequate supports or brackets may lead to sagging or detachment over time. Rushing the process or neglecting to use the correct tools and safety gear can compromise the quality of the replacement and pose safety risks.
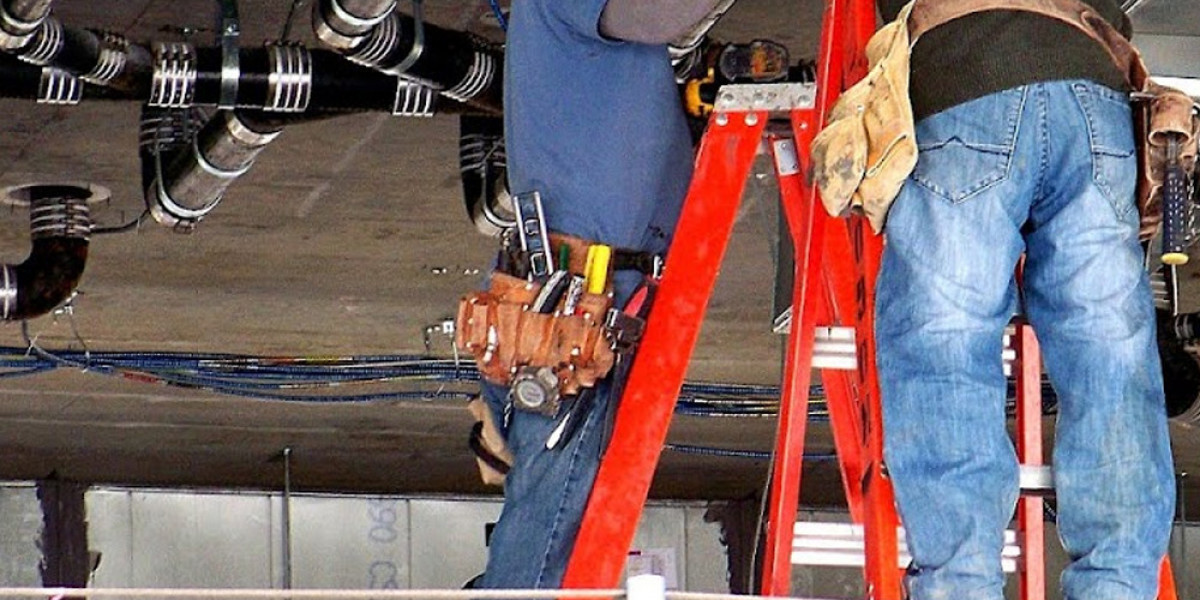
The Role of Professional Assistance in Duct Replacement
Professional assistance can be invaluable when dealing with intricate duct systems or hard-to-reach areas in your home. Experienced technicians possess the skills to assess the condition of your ductwork comprehensively and identify any underlying issues, such as hidden leaks or mould, that may not be immediately visible. They are equipped with specialised tools and materials to ensure precise installation, reducing the likelihood of future problems caused by improper fittings or insufficient sealing. Professionals are also well-versed in adhering to local building regulations, ensuring that the replacement meets safety and energy efficiency standards. Additionally, their expertise allows for a quicker and more streamlined process, minimising disruption to your daily routine. For more extensive projects, such as replacing ductwork in large properties or commercial spaces, the expertise of a professional team ensures the system is appropriately designed to maximise airflow and efficiency. Their work often includes warranty coverage, offering reassurance and protecting your investment.
Environmental and Energy Efficiency Benefits of New Ducts
Modern duct materials and designs significantly enhance the efficiency of heating and cooling systems by reducing air leakage and improving insulation. This ensures that energy is not wasted, allowing your HVAC system to work less intensively to maintain desired temperatures. Advanced materials also contribute to better airflow, ensuring even temperature distribution throughout the home and eliminating unnecessary strain on the system. Properly sealed and insulated ducts reduce the likelihood of pollutants entering the system, promoting a cleaner indoor environment. The improved energy efficiency of new ducts aligns with environmentally conscious practices, helping to decrease overall energy demand and greenhouse gas emissions. Additionally, enhanced insulation properties in newer ducts prevent energy loss in extreme temperature areas such as lofts or basements. These upgrades ultimately support both cost savings and a reduced environmental impact.
Conclusion
Ac Duct Replacement not only resolves issues like leaks and blockages but also improves overall system efficiency, contributing to consistent indoor comfort. By addressing worn or damaged ductwork, you reduce unnecessary strain on your HVAC unit and lower energy consumption. Proper preparation, material selection, and insulation ensure long-lasting results, while thorough sealing minimises air leaks and prevents future inefficiencies. Installing ducts with care enhances airflow and ensures even temperature distribution throughout your property. Regular inspections and maintenance further help maintain performance and prevent costly repairs. For complex systems or larger projects, enlisting professional assistance ensures precise installation and adherence to regulations. Upgrading your ductwork can also improve indoor air quality, making it a healthier environment for occupants, especially those with allergies or respiratory issues. Following a structured approach can make the process smoother and more effective.
6 faqs
1. How long do Ac Duct Replacement typically last?
Ac Duct Replacement can last 10-15 years but may need earlier replacement if damaged or inefficient.
2. What materials are best for duct replacement?
Flexible ducting, sheet metal, or fibreglass duct boards are commonly used, chosen based on needs like durability and insulation.
3. How can I detect air duct leaks?
Look for dust accumulation, inconsistent room temperatures, or rising energy bills as potential indicators of leaks.
4. Can damaged ducts impact air quality?
Yes, damaged ducts can allow dust, allergens, or mould into your system, reducing indoor air quality.
5. How do I maintain new ductwork?
Regular inspections, cleaning, and ensuring proper insulation help maintain efficiency.
6. Is professional duct replacement worth it?
Professionals bring expertise, tools, and adherence to standards, ensuring a more reliable installation.